Plasterboard Hole Repair: Small vs Large (and Why Mesh Matters)
12 April 2026·6 min read
Not all wall holes are equal. A screw hole and a fist-sized hole need different repairs — and the single biggest difference is whether you need a mesh patch. Here is how they compare.
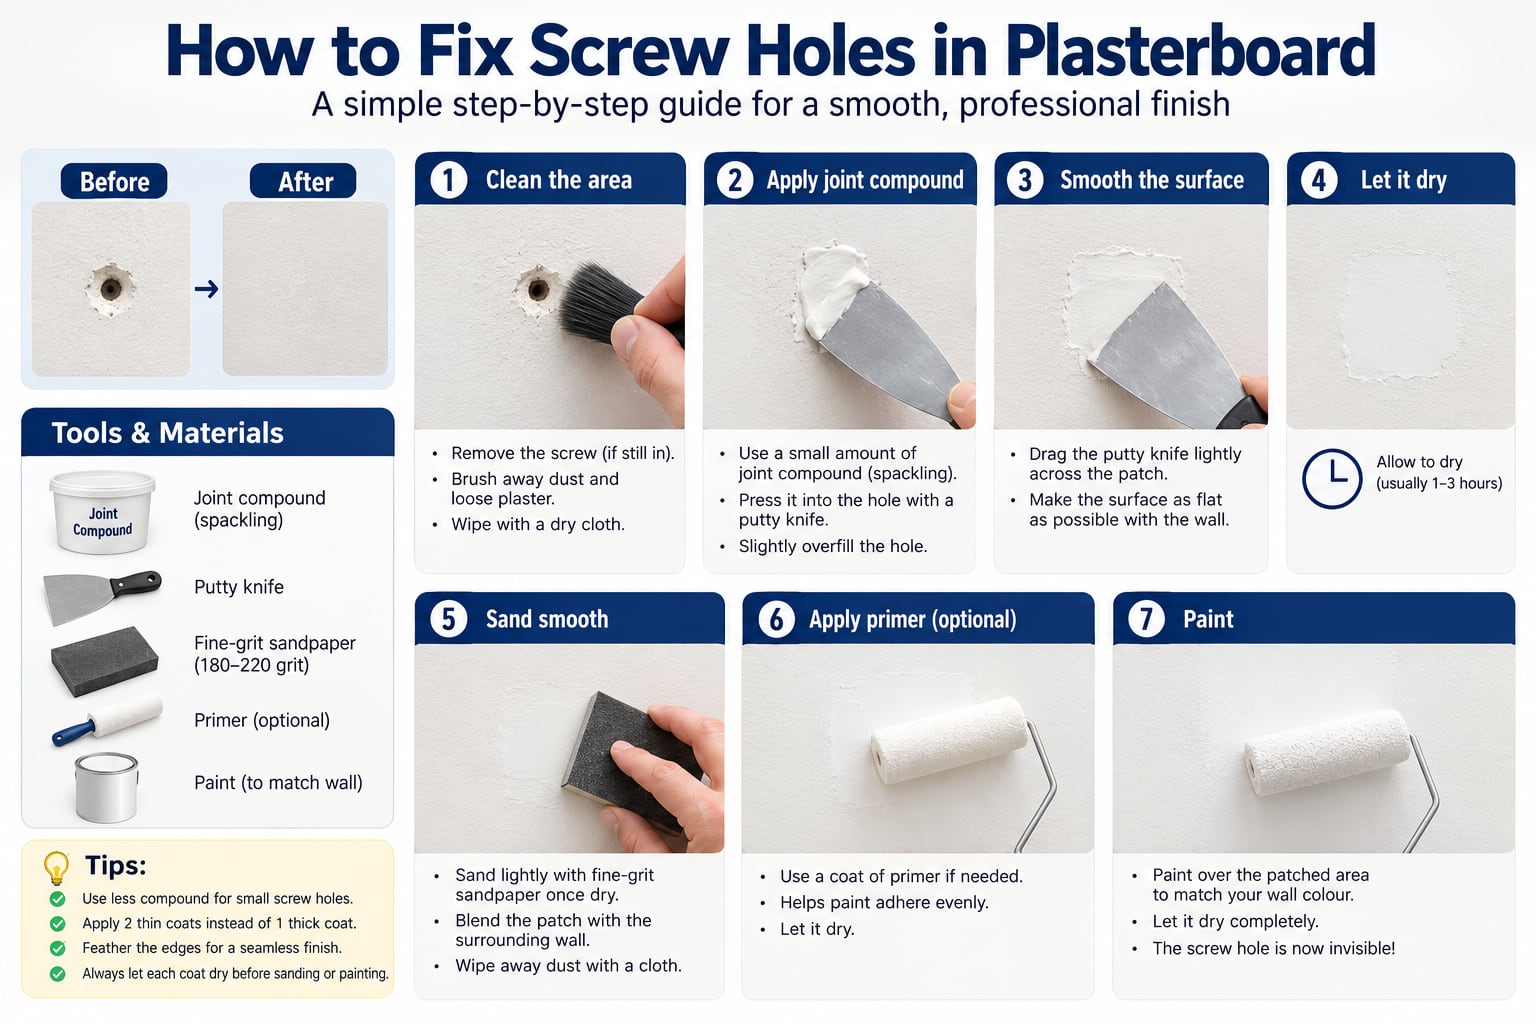
Screw & nail holes — no mesh needed
Small holes have enough surrounding plasterboard to support the filler, so you simply press in joint compound (spackling), smooth, sand and paint. No reinforcement required.
Large holes — mesh (and sometimes a backing piece)
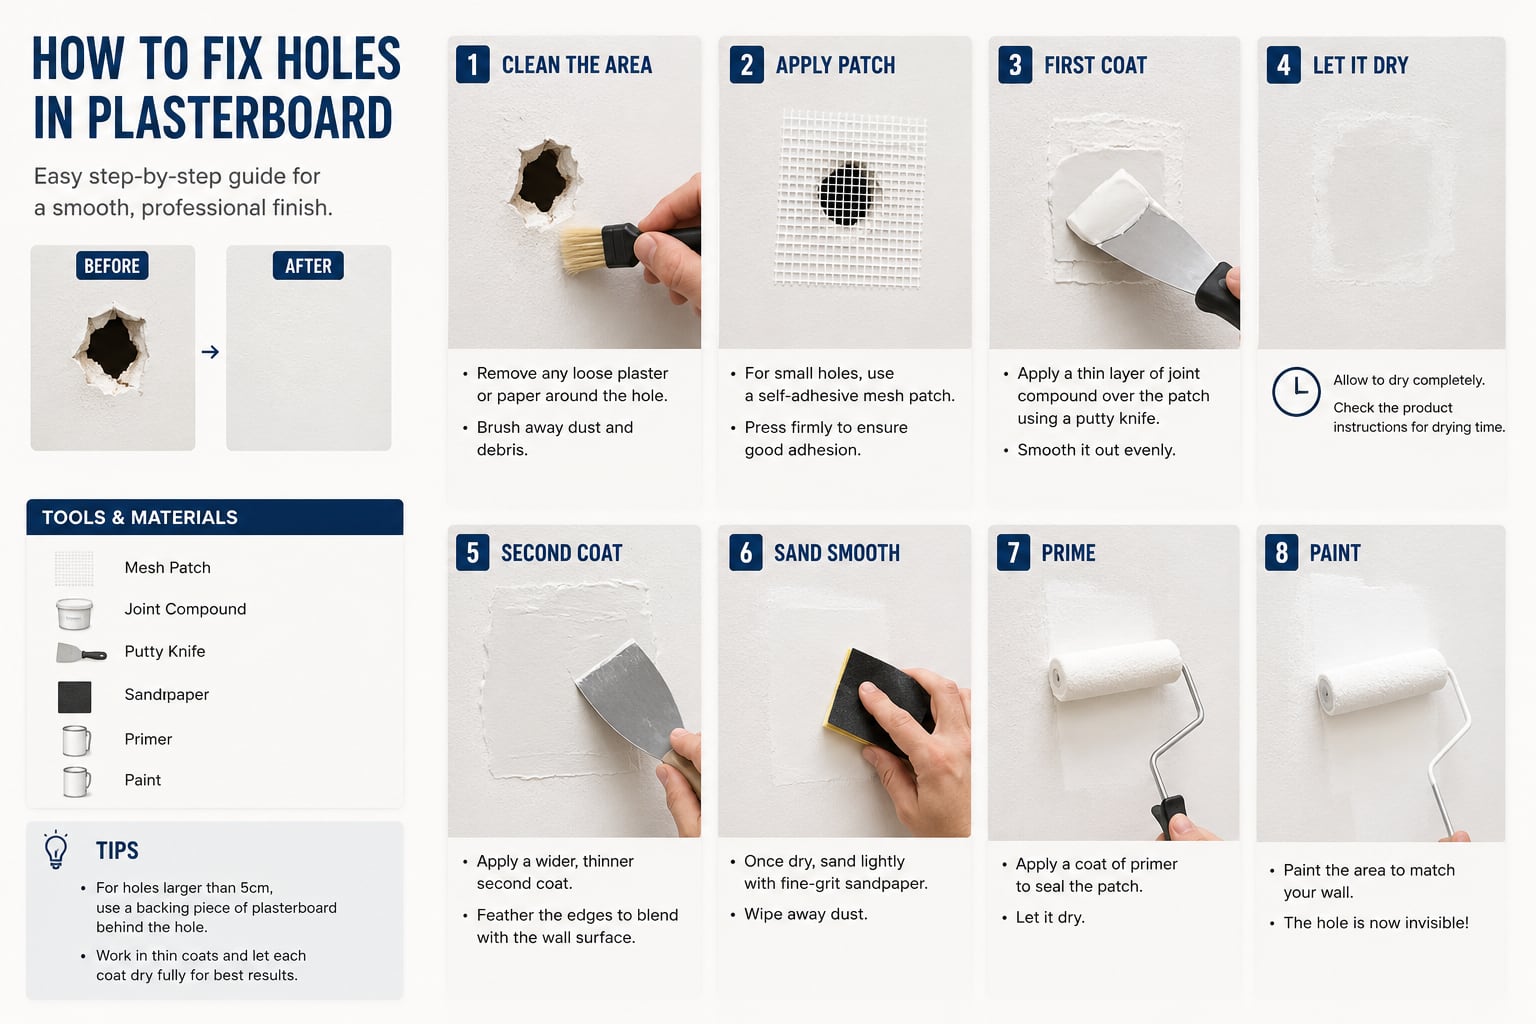
A large opening has nothing underneath to hold the compound — spackle alone would sag, crack and fall through. A self-adhesive mesh patch bridges the gap and gives the joint compound a rigid base to bond to, so the repair stays flat and crack-free.
Why the mesh matters
- Bridges the void — spans the hole so compound has something to grip.
- Prevents cracking — the mesh reinforces the joint against movement and shrinkage.
- Keeps it flat — stops the patch sinking or sagging as it dries.
- Over ~5cm — add a plasterboard backing piece behind the hole for real rigidity, then mesh and fill over it.
Side-by-side
- Small (screw/nail): compound only · ~1–3 hr dry · 7 steps · beginner.
- Large (patch): mesh + compound (+ backing over 5cm) · longer dry between coats · 8 steps · easy but patient.
- Shared finish: both get sanded smooth, primed and painted to disappear.
Tip: Rule of thumb: if the hole is smaller than a screw head, just fill it. If you can see into the cavity, reach for mesh.